| Home | About Vancouver Wire EDM | Our Capabilities | Our Machining Services | Tech Tips | Request a Quote |
Vancouver Tel: 604-899-8977 Fax: 604-899-0959
| |
Vancouver Wire EDM | |||||
Vancouver Tel: 604-899-8977 Fax: 604-899-0959
|
| MOUNTING
REQUIREMENTS IF IN ANY DOUBT; BEFORE YOU MAKE ANYTHING, ASK!!!! 604 899-8977 or marcus@implant-mechanix.com
|
|
Mounting style A (clamped to two tables): I need a minimum of 1 inch (25mm) from the edge of the stock to the closest part of the feature I will cut, in two places; front and left side or front and right side. |
|
Mounting style B (clamped to one table): I need a minimum of 2 inches clamping and overhang stock (50mm) for workpieces 5 pounds or less and 3 inches for workpieces more than 5 pounds |
|
| Mounting style C (EDM Vise): my vise will hold
blocks less than 6” long. |
|
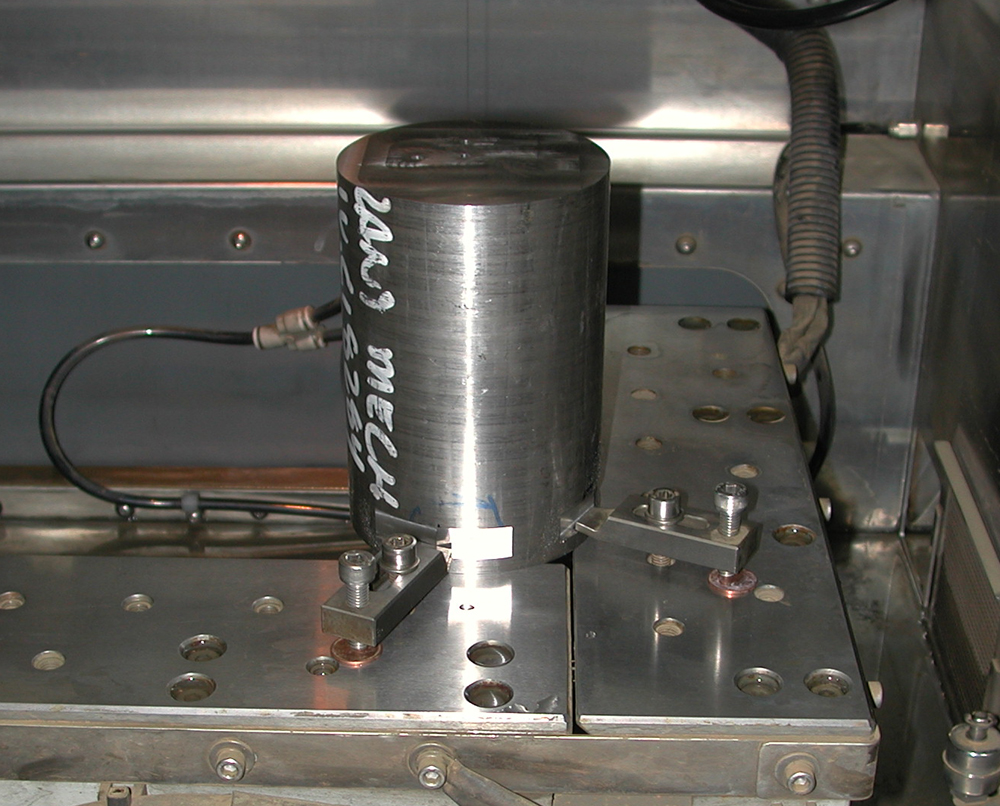
Mounting style D (Vee block): Cylinders need to
be smooth and round with ends faced parallel. |
|
Mounting style E (Rotary Table): The rotary table will accept workpieces maximum 4” diameter (100mm) and 10 lb maximum weight. |
|
WORKPIECE REQUIREMENTS:
1) Parallel surfaces top and bottom whenever possible.
2) Surface ground or smoothly milled mounting surface: I will not accept raw
castings, raw forgings, unprocessed hot rolled steel, sawcut or rough milled
blocks.
3) Clean and dry blocks; no oil, grease, preservative, coolant, dirt, paint,
layout fluid etc
4) Blocks ground square and parallel are best if you need me to reference one
or more datum edges. They must also be properly deburred
5) If you are making multiple parts, make the stock as big as possible.
I can mount a 9” x 14” block to the table and cut a lot of parts
while running the machine continuously (overnight if necessary). I need a minimum
of 0.120” (3mm) between parts and around the edges except where the plate
will be clamped as described above.
6) No anodizing; (it’s non-conductive and can’t be wire cut).
START HOLE REQUIREMENTS:
I NEED TO SEE YOUR PROPOSED
LAYOUT BEFORE YOU DRILL THE HOLES!
Email it to me at marcus@implant-mechanix.com
or fax it to me at 604 899-0959
1) Plain start holes: can be any diameter above 0.012” (0.3 mm). They must be deburred top and bottom but does not need to be chamfered. They can be drilled , hole popped, or made any other way desired. Hole popped start holes in aluminum and titanium must be reamed or abrasive honed to remove the oxide layer before they can be used for wire EDM.
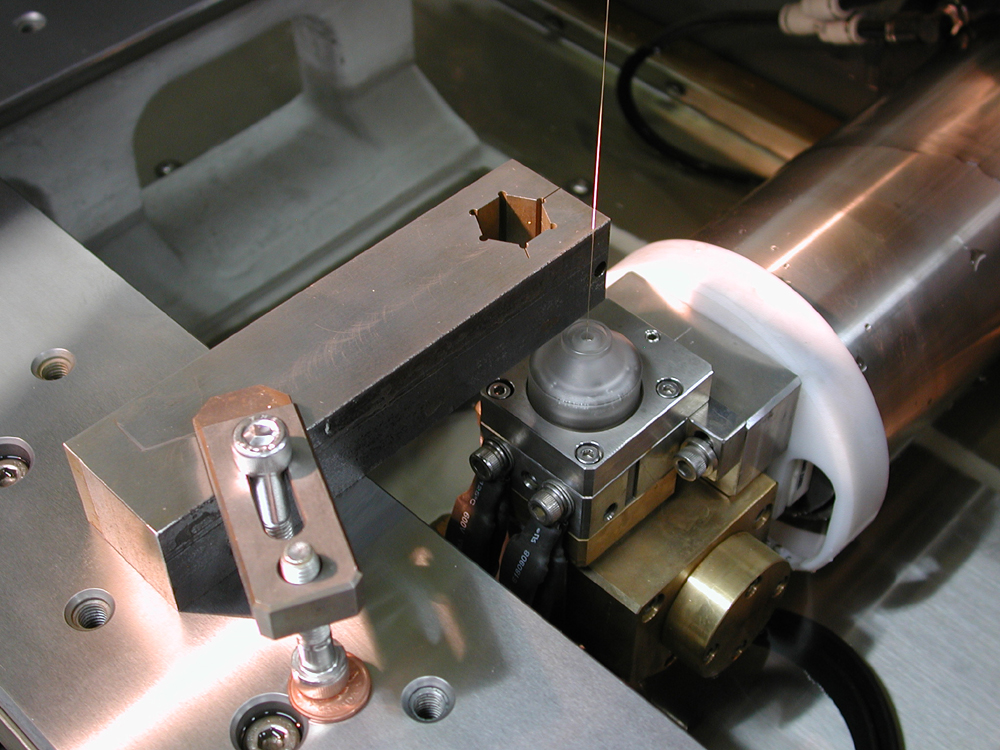
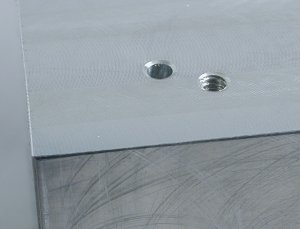
2) Reference start holes: must be stepped with a clearance hole on the underside if they cannot be plunged completely through the stock with an endmill or boring bar. Make the clearance a minimum 0.03” bigger in diameter than the reference bore. The reference bore can be any diameter but must be entirely bur free, as round and smooth as you can make it, in a known position relative to the features it references, and perpendicular to the top or bottom surface. The easiest way to make these is to pre-drill and follow with a new endmill plunged on location AFTER the clearance bore is finished from the underside. This eliminates burring of the hole edges and gives an accurate, smooth hole properly on location. The photo shows a reference start hole next to the tapped hole it references.
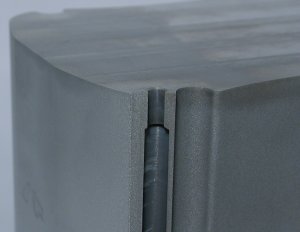
Here is a cutaway of the reference start hole sectioned so you can see the perfectly smooth, round, bur-free bore that I can locate to by touching the wire around its periphery and finding the center.
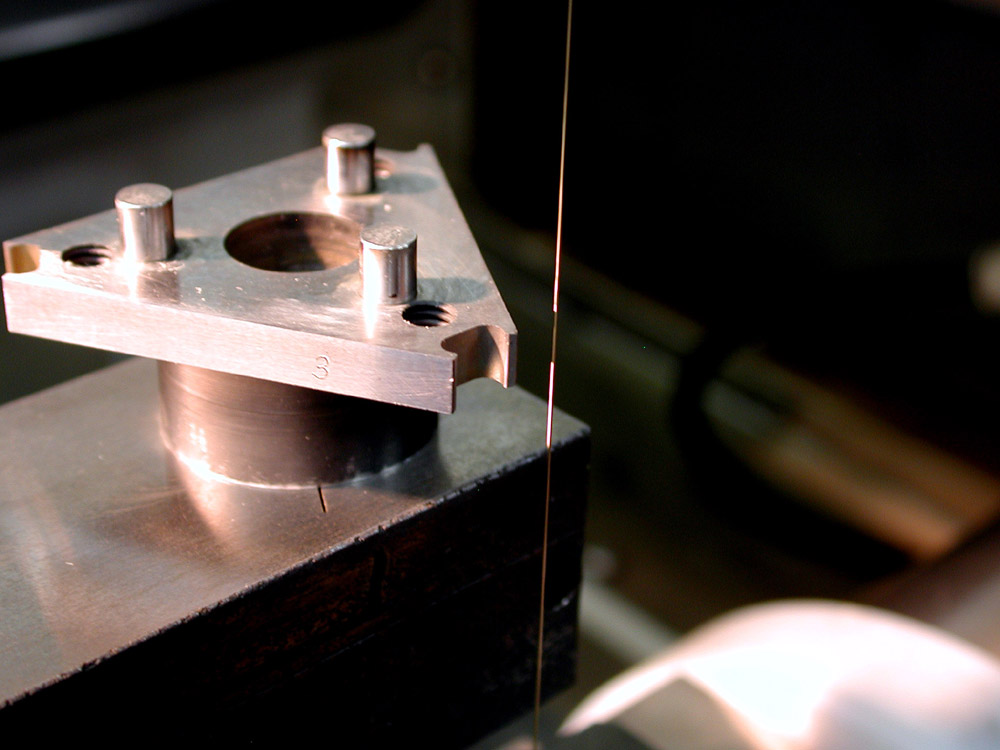
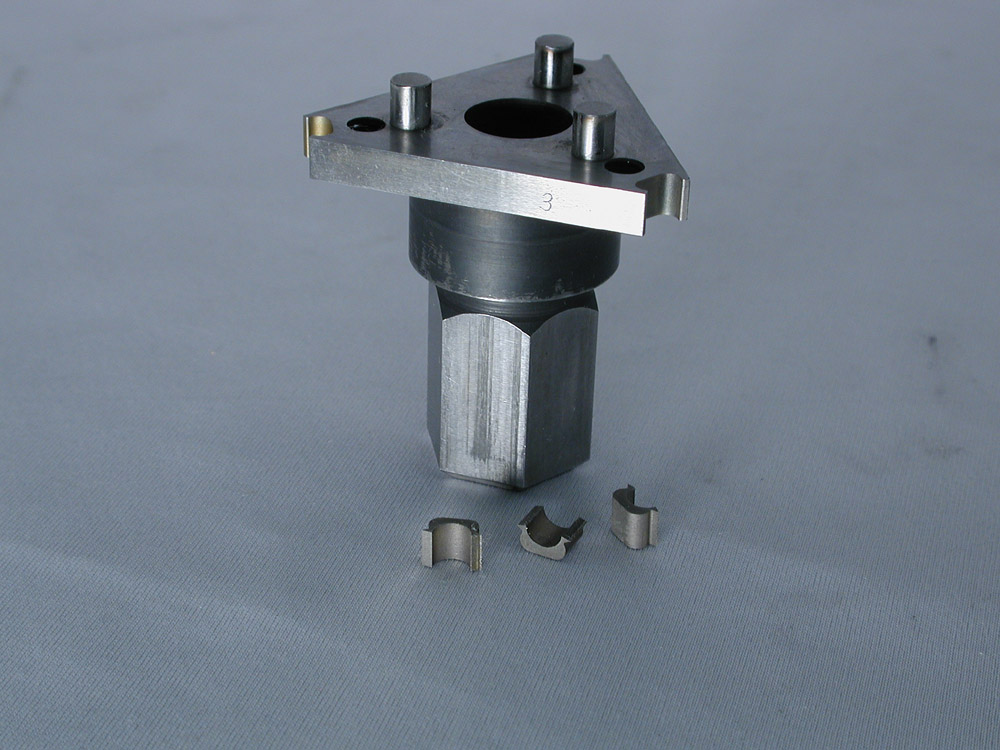
MOUNTING FIXTURES:
1) They must allow the part to be suspended in the worktank with NOTHING hanging
below the mounting surface that will bolt to the machine table.
2) They need to hang the part at least 1” (25mm) from the edge of the
table, and the mounting foot needs to be at least 3” (75mm) long.
3) They need to be strong enough to support the weight of the part hanging into
the tank but do not need to be strong enough to tolerate machining forces: wire
EDM is a non-contact process.
4) DO NOT MAKE THEM FROM ALUMINUM!!!
It will oxidize, become non-conductive and make the fixture non-useable very
quickly. The best choice for stability, economy and ease of manufacture is hot
rolled mild steel. DO NOT USE COLD ROLLED ON A FIXTURE THAT NEEDS TO REMAIN
ACCURATE AFTER MACHINING.
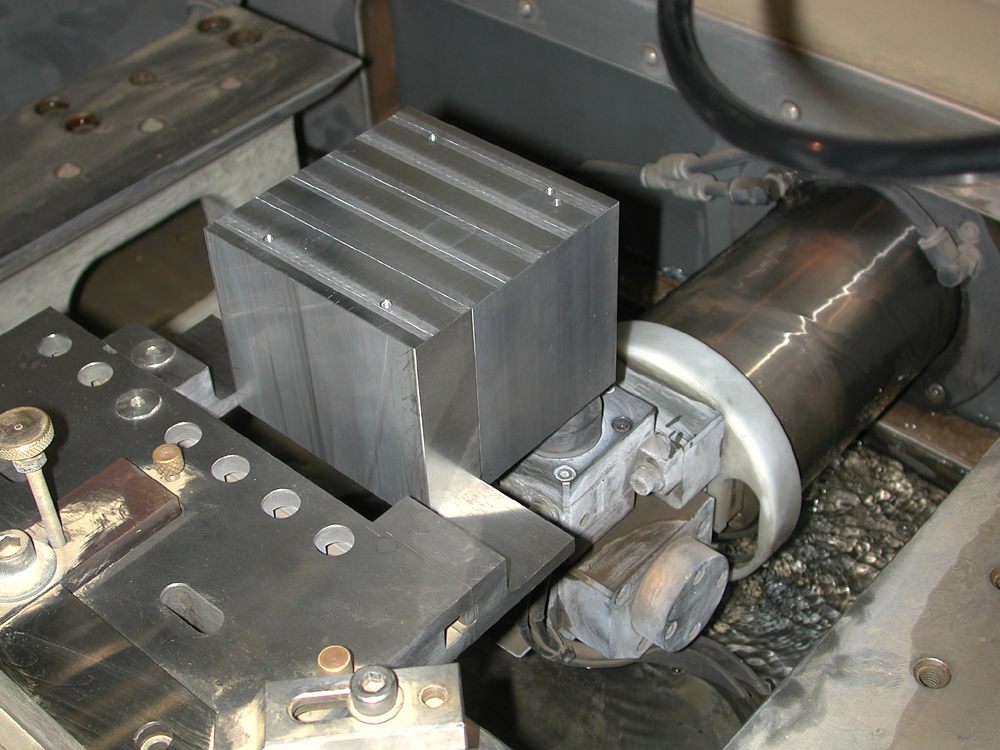
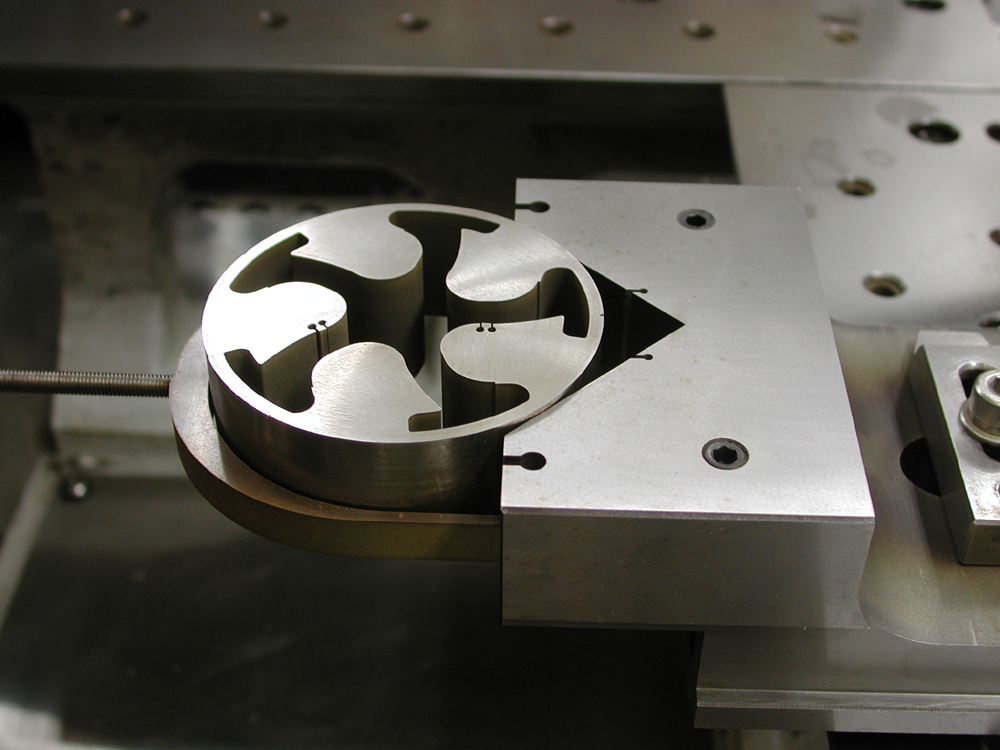
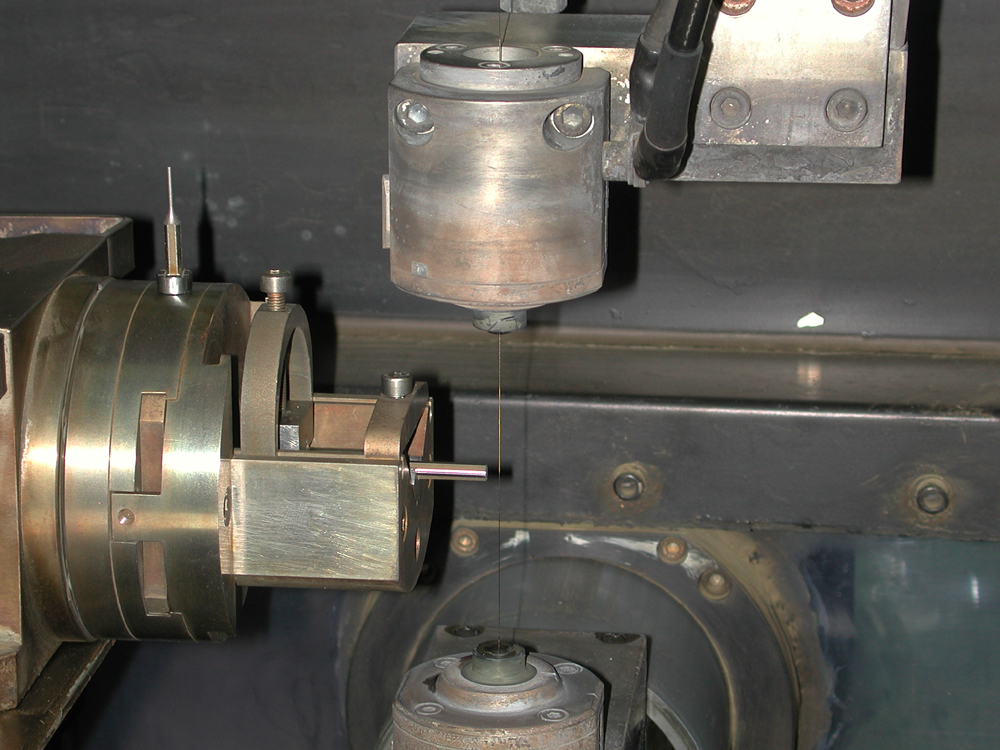
Here is a typical fixture in use, and the part it holds for machining:
|
 |
 |
Click
on images to enlarge |
REMINDER: IF IN ANY DOUBT;
BEFORE YOU MAKE ANYTHING, ASK!!!! 604 899-8977 or marcus@implant-mechanix.com.
| ©2012Vancouver Wire EDM | Home • About Us • Capabilities • Wire EDM Info • Products |